 Try Hack Me
 Hack The Box
https://www.tryhackme.com/room/anonymous
Anonforce is an easy level room on Try Hack Me that focuses on FTP Servers, decrypting hashes, decrypting and importing GPG/PGP keys.
We start with a Rustscan[1] to quickly find any available ports, with an Nmap report on the service versions found on the discovered ports.
sudo rustscan -a 10.10.52.22 -- -sV -sS -oN anonymous_nmap.txtThe above scan is referencing the IP address to be scanned (10.10.52.22) and calling for the following parameters from Nmap[2]:
Nmap Commands Overview:Results:
# Nmap 7.91 scan initiated Wed Aug 25 22:11:53 2021 as: nmap -vvv -p 22,21 -sV -sS -oN anonforce_nmap.txt 10.10.52.22| PORT | STATE | SERVICE | REASON | VERSION |
|---|---|---|---|---|
| 21/tcp | open | ftp | syn-ack ttl 61 | vsftpd 3.0.3 |
| 22/tcp | open | ssh | syn-ack ttl 61 | OpenSSH 7.2p2 Ubuntu 4ubuntu2.8 (Ubuntu Linux; protocol 2.0) |
We have found the machine has an FTP server and has SSH enabled. First thing first, lets check to see if 'anonymous' is enabled on the FTP server. Judging by the name of this room, there is a safebet anonymous should work
ftp 10.10.52.22.We have access to the FTP server. Looking at the contents:
ftp> ls| drwxr-xr-x | 2 | 0 | 0 | 4096 | Aug 11 2019 | bin |
| drwxr-xr-x | 3 | 0 | 0 | 4096 | Aug 11 2019 | boot |
| drwxr-xr-x | 17 | 0 | 0 | 3700 | Aug 25 19:08 | dev |
| drwxr-xr-x | 85 | 0 | 0 | 4096 | Aug 13 2019 | etc |
| drwxr-xr-x | 3 | 0 | 0 | 4096 | Aug 11 2019 | home |
| lrwxrwxrwx | 1 | 0 | 0 | 33 | Aug 11 2019 | initrd.img -> boot/initrd.img-4.4.0-157-generic |
| lrwxrwxrwx | 1 | 0 | 0 | 33 | Aug 11 2019 | initrd.img.old -> boot/initrd.img-4.4.0-142-generic |
| drwxr-xr-x | 19 | 0 | 0 | 4096 | Aug 11 2019 | lib |
| drwxr-xr-x | 19 | 0 | 0 | 4096 | Aug 11 2019 | lib64 |
| drwx------ | 2 | 0 | 0 | 4096 | Aug 11 2019 | lost+found |
| drwxr-xr-x | 4 | 0 | 0 | 4096 | Aug 11 2019 | media |
| drwxr-xr-x | 2 | 0 | 0 | 4096 | Feb 26 2019 | mnt |
| drwxrwxrwx | 2 | 1000 | 1000 | 4096 | Aug 11 2019 | notread |
| drwxr-xr-x | 2 | 0 | 0 | 4096 | Aug 11 2019 | opt |
| drwxr-xr-x | 99 | 0 | 0 | 0 | Aug 25 19:08 | proc |
| drwx------ | 3 | 0 | 0 | 4096 | Aug 11 2019 | root |
| drwxr-xr-x | 18 | 0 | 0 | 540 | Aug 25 19:08 | run |
| drwxr-xr-x | 2 | 0 | 0 | 12288 | Aug 11 2019 | sbin |
| drwxr-xr-x | 3 | 0 | 0 | 4096 | Aug 11 2019 | srv |
| dr-xr-xr-x | 13 | 0 | 0 | 0 | Aug 25 19:08 | sys |
| drwxrwxrwx | 9 | 0 | 0 | 4096 | Aug 25 19:08 | tmp |
| drwxr-xr-x | 10 | 0 | 0 | 4096 | Aug 11 2019 | usr |
| drwxr-xr-x | 11 | 0 | 0 | 4096 | Aug 11 2019 | var |
| lrwxrwxrwx | 1 | 0 | 0 | 30 | Aug 11 2019 | vmlinuz -> boot/vmlinuz-4.4.0-157-generic |
| lrwxrwxrwx | 1 | 0 | 0 | 30 | Aug 11 2019 | vmlinuz.old -> boot/vmlinuz-4.4.0-142-generic |
We have access to what appears to be the systems current file directory. We should check to see if we can download '/etc/passwd' for any information:
ftp> cd /etc/Success, tho we don't see anything overly useful within the file other than the username 'melodias'. I tried to see if I can download '/etc/shadw' but it appears 'anonymous' does not have the access to get this file. I was, however, able to grab the user flag. As we have access to the live machine via FTP we have technically compromised the machine?
ftp> cd /home/melodias[1]https://rustscan.github.io/RustScan/
[2]https://nmap.org/book/man.html
As we have access to the machine and we can view the users 'home' directory, we can grab the flag.
ftp> ls -la| drwxr-xr-x | 4 | 1000 | 1000 | 4096 | Aug 11 2019 | . |
| drwxr-xr-x | 3 | 0 | 0 | 4096 | Aug 11 2019 | .. |
| -rw------- | 1 | 0 | 0 | 117 | Aug 11 2019 | .bash_history |
| -rw-r--r-- | 1 | 1000 | 1000 | 220 | Aug 11 2019 | .bash_logout |
| -rw-r--r-- | 1 | 1000 | 1000 | 3771 | Aug 11 2019 | .bashrc |
| drwx------ | 2 | 1000 | 1000 | 4096 | Aug 11 2019 | .cache |
| drwxrwxr-x | 2 | 1000 | 1000 | 4096 | Aug 11 2019 | .nano |
| -rw-r--r-- | 1 | 1000 | 1000 | 655 | Aug 11 2019 | .profile |
| -rw-r--r-- | 1 | 1000 | 1000 | 0 | Aug 11 2019 | .sudo_as_admin_successful |
| -rw-r--r-- | 1 | 0 | 0 | 183 | Aug 11 2019 | .wget-hsts |
| -rw-rw-r-- | 1 | 1000 | 1000 | 33 | Aug 11 2019 | user.txt |
Looking at the systems file directories, I notice 1 directory that is not normally on Ubuntu systems:
| drwxrwxrwx | 2 | 1000 | 1000 | 4096 | Aug 11 2019 | notread |
Lets look inside this directory and see if there is anything of interest inside:
| drwxrwxrwx | 2 | 1000 | 1000 | 4096 | Aug 11 2019 | . |
| drwxr-xr-x | 23 | 0 | 0 | 4096 | Aug 11 2019 | .. |
| -rwxrwxrwx | 1 | 1000 | 1000 | 524 | Aug 11 2019 | backup.pgp |
| -rwxrwxrwx | 1 | 1000 | 1000 | 3762 | Aug 11 2019 | private.asc |
We have a PGP and an ASC file. Lets download these both to our machine and review the contents and discuss what an ASC and PGP file is:
ftp> get backup.pgpFirst things first, what even is a PGP file and what do we do with it?
Well a PGP (Pretty Good Privacy), also known as GPG, is a type of encryption used for signing messages or data. It uses a system of "public" or "private" keys to do this[3]. The use of the word key here does not mean a physical item, just to be clear. This is just a piece of information used to help transform any plaintext data into a ciphertext, or to decrypt a ciphertext into plaintext. So, what is a public key and a private key, and what are the differences?
A private key is the first half of a GPG key and should be kept a secret. The reason for this is the first half of the message is encrypted using this key and it is used to decrypt any messages sent or recieved using the same publicly shared GPG key. It is also used to sign the message to prove that you own the key.
A public key is the second half of the GPG key and it can be made public knowledge if you so please. This is only used to encrypt messages or data for the owner of that private key. It is entirley useless at decrypting so knowledge of this key means really nothing. But how does this tie in with the ASC file we also retrieved?
Well that ASC file is the key. We need to import that file and we can then use that key to decrypt the backup.pgp file so we can see what the contents are. Only problem is, we don't know the passphrase for the key meaning we can not use it to decrypt the PGP file. As we have the private key, we can try decrypting it and see if we can guess the password using a wordlist. To do this we now need to meet my friend 'john'.
John The Ripper[4] is a bruteforcing tool used to crack a variety of different encryption on operating systems. The tool itself is very broad and will be used on multiple rooms throughout my website, the only portion we will be using it for in this one is the ASC key[5]. First action is converting the ASC into a hash file using john:
gpg2john private.asc > private.hashNext we need to use 'john' to bruteforce the hash against a wordlist. The most common wordlist used in these practice rooms is the 'rockyou.txt'. Due to this, we will use this list and not a standard seclist you can get on the Kali machine:
john -wordlist=/usr/share/wordlists/rockyou.txt private.hashSuccess! We have the passphrase to the private key, we now just need to import it using gpg.
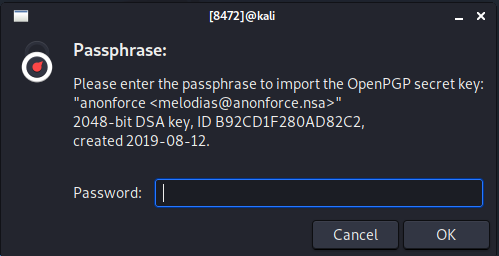
gpg --import private.ascUsing the password we have cracked, we can input it into the authentication section so it will import the key correctly:

Now we need to decrypt backup.pgp:
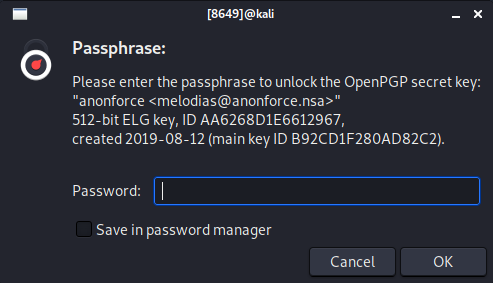
gpg --decrypt backup.pgpInput the same password as before:

We have a backup of 'passwd' but it is showing 2 users with passwords. With this information we can try to bruteforce 'root' and see if we can SSH with those credentials. But how do we do that? Now it is time to introduce 'hashcat'.
Hashcat[6] is another bruteforcing tool used on hashes to try to decode what the users password might be. This tool does use GPU as its processing power, so it is essential to have a decentish graphics card to help speed up the process of decoding. The way this tool works is we need to feed it a wordlist. Once it has this wordlist, it will then encode each word within that list against the hash we set within it and match to see if the values are equal. If this doesn't make sense, don't worry we will be going into detail on what parameters I run along with what it is doing in the backend.
First thing first, we need to put this hash into its own file so hashcat can attempt to decode it:
Wait a second, did you notice a mistake just then? Lets verify if that worked properly:
cat root_password.hashWhy didn't that work? Well it is due to the '$'. Bash uses '$' for a variety of different reasons and with different patterns for it. An example is $?. This is used to look at the last executed binary/command on the system. This is also used with $1 as an example. So to counter this we need to use '\' when inputting any special character with bash:
echo \$6\$07nYFaYf\$F4VMaegmz7dKjsTukBLh6cP01iMmL7CiQDt1ycIm6a.bsOIBp0DwXVb9XI2EtULXJzBtaMZMNd2tV4uob5RVM0 > root_password.hashHaving verified that we have saved the hash correctly using echo, we can now try decoding it using hashcat:
hashcat -m 1800 root_password.hash /usr/share/wordlists/rockyou.txtUsername:Password
root:hikariWhat just happened you may be asking. Well we just used hashcat to encode each word in the specified wordlist and compare it against the hash in our saved file. A greater breakdown on this information:
Hashcat Commands Overview:With all of that, we can now log into the machine via SSH and retrieve the root flag:
ssh root@10.10.52.22| * Documentation: | https://help.ubuntu.com |
| * Management: | https://landscape.canonical.com |
| * Support: | https://ubuntu.com/advantage |
[3]https://www.privex.io/articles/what-is-gpg
[4]https://github.com/openwall/john
[5]https://www.openwall.com/lists/john-users/2015/11/17/1
[6]https://hashcat.net/wiki/
[7]https://hashcat.net/wiki/doku.php?id=example_hashes
I know this one seemed like a long room, but it really isn't. I go into a little depth on a few things which adds to the reading. If I didn't this page would be a 3 minute read. Hopefully you have walked away knowing that PGP/GPG exist, they are secure (with a strong password) and useful with encrypting data. You also understand john the ripper and hashcat and the basic function of how to use it to bruteforce passwords. Thank you for reading through my walkthrough.